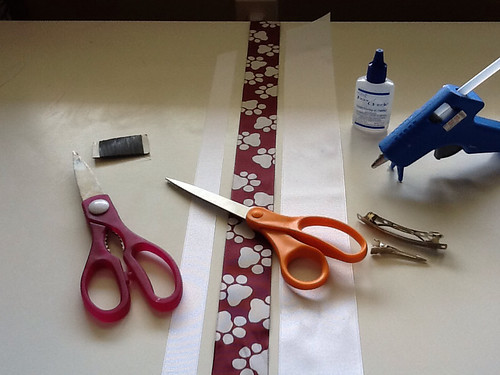
Sewing

Wednesday, March 27, 2013

Pattern tracing and upcycling

I have a new favorite and inexpensive way to trace and save patterns in all the sizes offered in a pattern. In the past I have used a large roll of butcher paper from Hobby Lobby, which I found a bit expensive. The other day I saw a roll of plain white wrapping paper in the Dollar Tree. I just tried it out and it works great!

The roll is only 3 yards long, but it is very wide. It should last a few months at least.

Also this morning I'm busy turning these thrift store clothes into cute new shorts and capris for The Lucky Rabbit. If you are in the Hattiesburg, MS area you won't want to miss the April Market the 4th-7th.

Sunday, October 14, 2012

Double-Decker Hairbow Tutorial

Supplies needed:
Thin wire
Wire cutters or old kitchen shears, something you don't mind using to cut wire- it will ruin your good scissors
Good ribbon cutting scissors
Fray check
Hot glue gun and glue stick
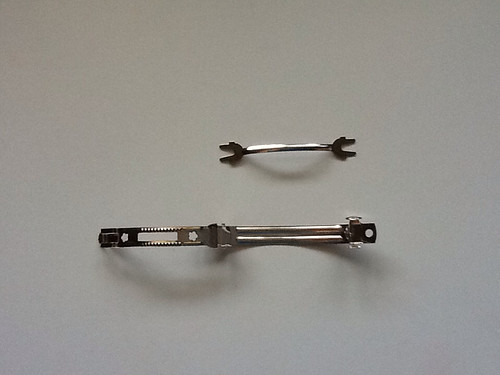
Barrette
Ribbon
7 inches of 7/8 inch grosgrain ribbon
30 inches of 1 1/2 inch grosgrain ribbon
25 inches of 2 1/4 inch grosgrain ribbon
Cut 2 pieces of wire about 4 inches long and set aside.

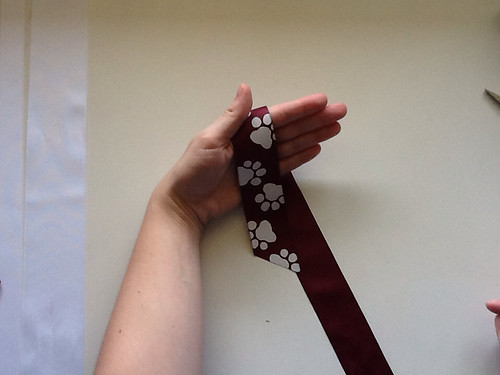
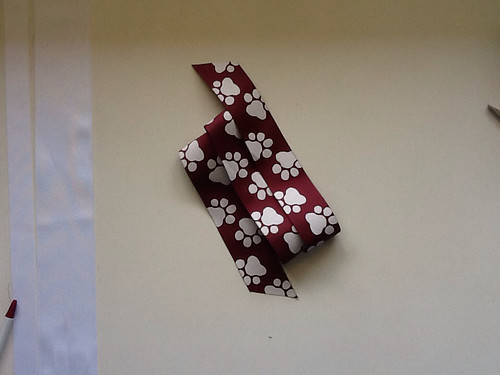
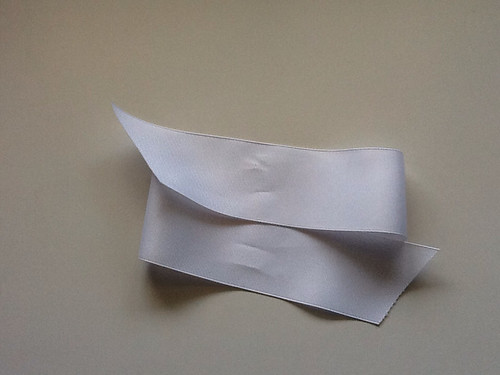
Lay the piece of 1 1/2 inch ribbon over your hand like so. Keep in mind I am right handed. If you are left handed, then reverse the hand used.

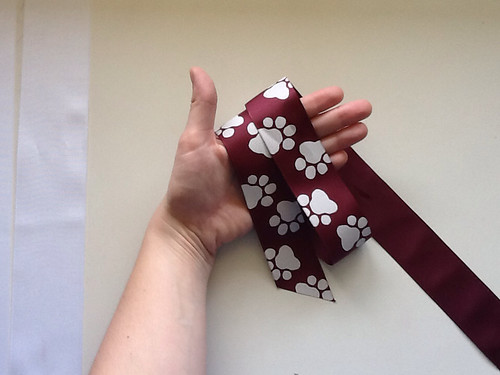
Use the long tail to make a wrap around your hand, overlapping the edge of the first piece slightly and keeping it loose at the bottom of your hand. Now make 1 more wrap around, overlapping the second layer slightly and matching the bottom area again.

Carefully lay this down on the table. Notice each layer is slightly overlapping the last and the ends of ribbon are almost the same length. The length of these wraps are what determines the size of your finished bow. These loops should be about 6 inches long.

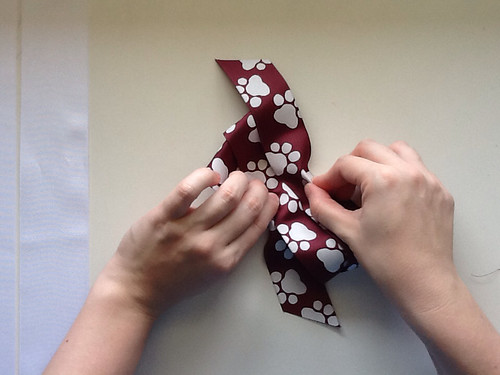
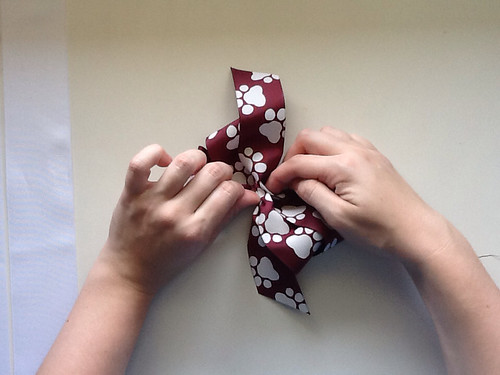
Using both hands, one on top and one on bottom, "scroonch" up the ribbon by gathering it tightly in between your fingers.

This takes practice, so be patient with yourself. If you get lots of wrinkles, just iron them out and start again. Don't iron directly on printed ribbon like this paw print ribbon though.
Wrap a piece of wire around the middle of this section to hold it in place while you continue working.
 
Now if you don't want a fancy smancy double-decker hairbow, you can stop here and follow the directions for finishing this smaller bow. This bow would be a good size for about a 2-3 year old.
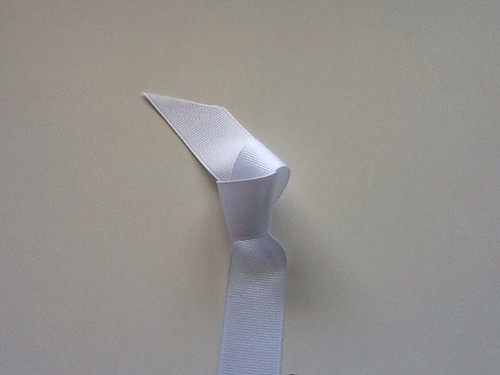
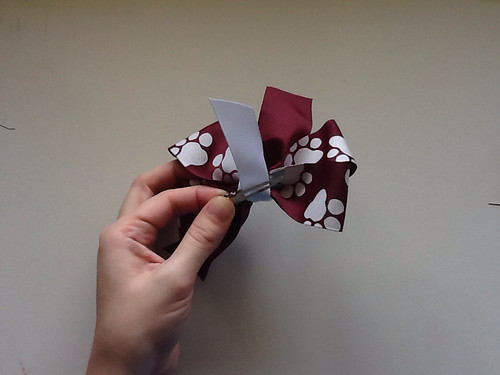
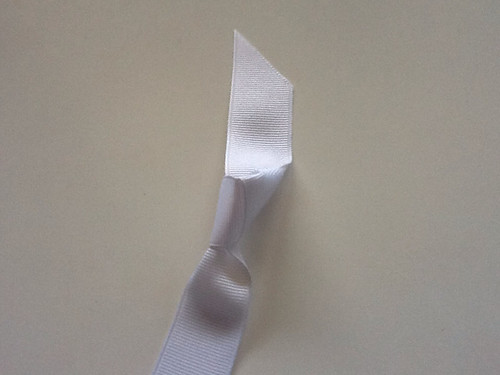
Use the piece of 7/8 inch ribbon and loop over and through itself just as you would to make a knot. Except when you do, be careful to make it pretty especially as you are tightening it down.
Do not tighten as much as you can, but leave it rather loose. Notice how it forms a point, or triangle in the middle, and the tails are lying flat.
Trim the extra wire from the back of the bow, leaving enough to hold the twist together, but not so much it is in the way.
Lay the knot on the center front right over the wire, and pull one tail to the back rather tightly.
Put a dab of hot glue on the center in the back. Make sure you've got the knot centered on the front and glue the tail down. Trim away the excess tail.
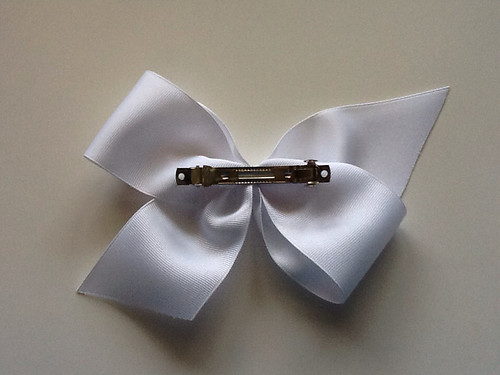
Put another dab of glue and stick the barrette down (if using the springy type of barrette see instructions below).
Open the barrette and pull the other tail around tightly, put a little glue underneath and stick it down.
Trim away the excess tail.
Trim ends of bow, cutting with one smooth motion at a 45 degree angle, apply fray check to the ends and you are done.
 

NOW FOR THE DOUBLE DECKER ADDITION:

Do not finish off the bow above, but stop after wrapping the wire around the first bow section, and continue below.

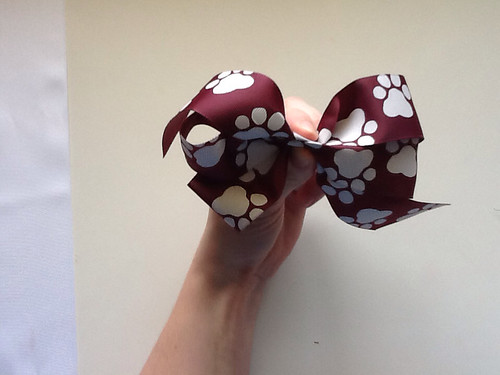
Wrap the 2 1/4 inch piece of ribbon around your hand the same as you did before, except this time you only have 2 wraps instead of three. You could also just lay it flat on the table and arrange it. Notice the edges are overlapped and the ends are cut in the same direction as the ends on the smaller bow.

Lay carefully on table. These loops should be about 7 inches long.

Scroonch up this bow and wrap with wire.

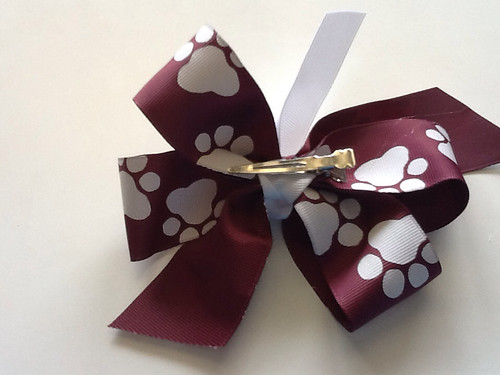
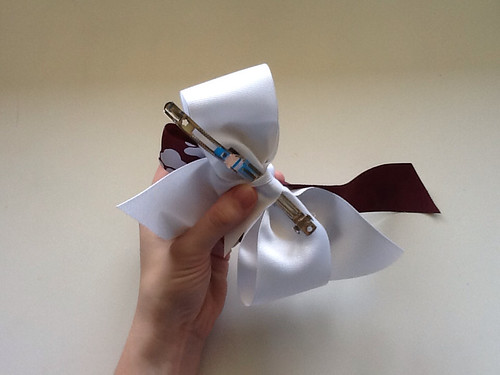
If using a springy barrette, take out the center portion and set aside (if using a clip type barrette read directions above).

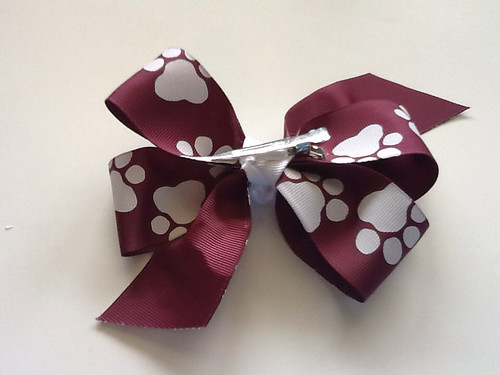
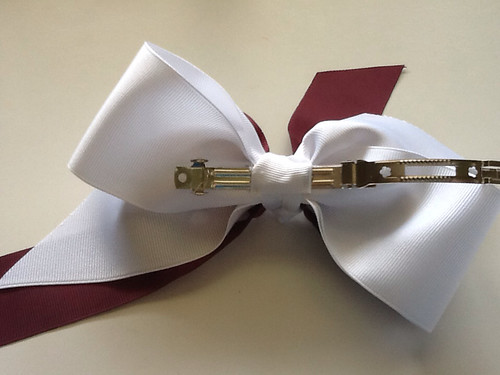
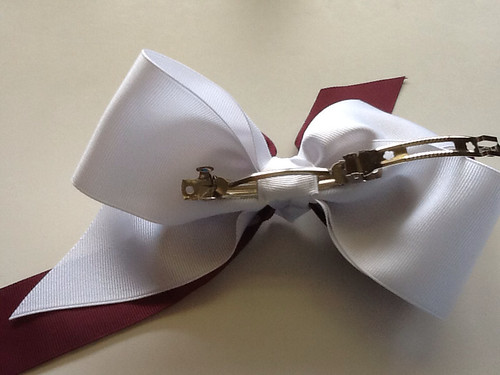
Turn large bow over, clip excess wire, and hot glue barrette onto middle of bow.

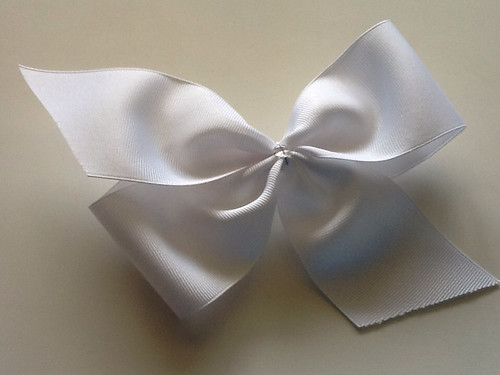
This is what it looks like from the front.

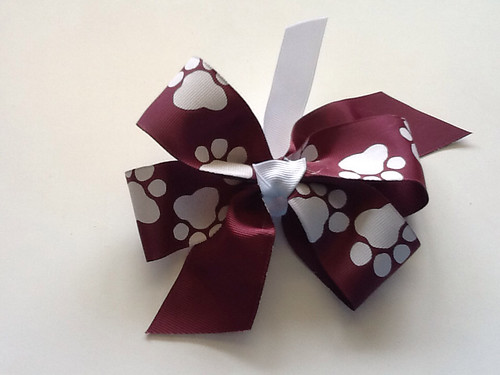
Use the 7/8 inch piece of ribbon to make a knot for the middle.

Tie a loose knot in the middle of this piece of ribbon, but do not pull tightly.

Carefully arrange the knot as you tighten it so that it is pointed in the middle and the tails are lying flat.

Trim wire on smaller bow.

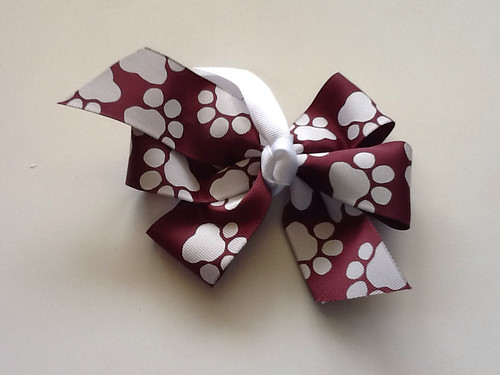
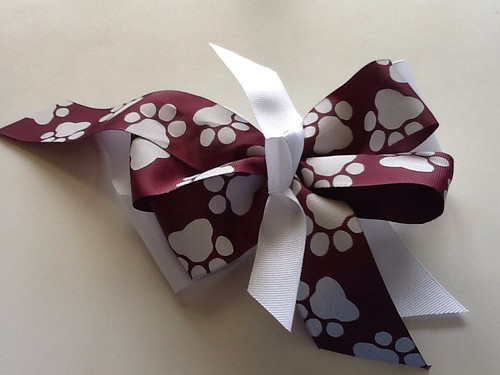
Dab hot glue on top of larger bow and stack smaller bow on top.

Place knot in the middle and add a bit of hot glue in between here too.

Pull one tail around tightly and hot glue the tail down on back side.

Trim the excess tail.

Pull other tail around tightly and hot glue in place also. Trim this tail.

Reinsert springy mechanism.

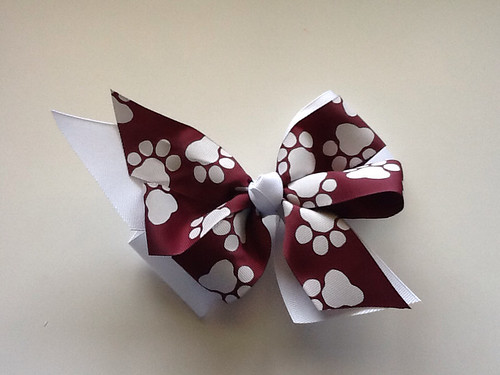
Trim all 4 edges so that they go the same direction and are pleasing to you. I always trim the ends last. Apply fray check or burn edges and you are done.


Thursday, October 11, 2012

Nightgown

One of the latest presents I have made is this nightgown for my niece. She recently turned 2 and had a Minnie Mouse party. I picked this soft comfy knit polka dot at a remnant clearance sale recently for 20 cents a yard!!!! I know, freak out moment.
This was only one piece of the 2 huge bags I bought that night while my husband not-so-patiently waited in the car with 2 of the kiddos (1 was "helping mommy shop").

I adapted the new pattern I've been working on, and have yet to completely put together, by adding length, a deep ruffle, and a slight ruffle at the wrist.

Little Belle seems to like the print and the softness of it and my girls want one now. So who knows, the pattern may turn into a nightgown tutorial before it's finished.


Wednesday, October 10, 2012

Button storage

Do not, I repeat do not let your baby help organize your buttons.

I have a rather large button stash because a local store sells buttons at 3 cards for $1 and sometimes 4 cards for $1. If you use buttons you know this is a steal. So when I see some I like, I pick up a handful.

They were all lined up in this wipe box, that is until it got pulled into the floor.

After this photo was taken, I cut cardboard pieces that fit inside the wipe box to make 3 rows for buttons.

I sorted them out again by color and put them back in using rainbow order, then wrote on the front of the box which colors were in which row.

Free and easy button organizing!


Tuesday, October 9, 2012

Monday, October 8, 2012

Potty Training Hail Mary

What do you do when you need to potty train a child who has been almost fully potty trained in the past, only to then experience horrifying constipation? I will spare you the details of our constipation experience, but I will tell you that it involved almost a year of medical treatment. During this treatment our little lady continued to use the potty for #1 until the last few months. Shortly after the initial constipation episode she began to hold her #2 rather than go through the pain of trying to go potty. This compounded things, and to sum it all up many diapers, pull-ups, bottles of milk of magnesia, suppositories, tears, battles, and bottles of miralax later we finally have the go ahead from our pediatric gastroenterologist to potty train again.

But how to do it?

We already have the princess potty that sings. We already have big girl panties. We already did sticker charts a year ago.

So I began to plan. The plan had to be big. It had to be something exciting, to make pottying fun. Parties are one of her favorite things right now. So why not have a special party? I also knew we had to get rid of diapers and pull ups because that was where she felt comfortable doing #1 and #2.

I investigated cloth training pants and found the Best Bottoms Training Pants. When I saw the cute patterns on the soakers I knew she would love them. Maybe they would work?

 
I ordered them for both girls, and let them choose their colors. Of course they chose bubblegum pink. I also began to talk about our training pants that would be coming in the mail soon. I kept reminding her that we were getting ready to stop wearing diapers and would be wearing "big girl training pants" soon.

These would be one present for our party, a new nightgown was another, a new princess potty seat that sits on the big potty was another, and lastly a watch that sings every so often to remind you when to go potty (this was one of the biggest problems the first time I potty trained because I couldn't remember to take them often enough).

 
They also love to get mail, so I decided to make out an invitation and let them check the mail to find out about their surprise big girls party. After reading the invite we walked around to our back deck where the party was all set up.

They were so excited to see the decorations and presents. I spent very little on the party itself, but the presents did cost a bundle (I was willing to try anything at this point). The party food was left over from our niece's birthday party, and all the decorations came from Dirt Cheap for 50 cents each.

There is one last huge element to this entire plan, the poo poo bucket and pee pee bucket. The gastroenterologist nurse practitioner recommended the "poo poo bucket" and I thought it was a good idea, but I was hesitant because I have 3 children at home on a daily basis who would all need to partake from the bucket, but in the end I was ready to try whatever it took, so i went as far as making a pee pee bucket too for emphasizing both, because frankly 2 of the 3 children needed to work on both.

This is how it works. The buckets are filled with goodies, my pee pee bucket has stickers, straws, and small toys, and the poo poo bucket has slightly bigger suprises. Pens and small notebooks seem to be a favorite prize along with candy of course. The buckets are placed out of reach in the bathroom and the children are not allowed to touch them unless they use the potty. When they use the potty they can choose something from the bucket!!!! Now if the bucket is not tempting enough, mommy can go through the bucket and ooh and ahh over all the neat prizes to tempt the child to try to potty.

The party was a blast. We ate and opened presents. I explained the bucket system and we played with all the new presents. Right away they wanted to try on the training pants. Review to come later on.

After the party we practiced singing a potty song we learned from Daniel Tiger's Neighborhood. It goes like this:

"When you have to go potty, STOP, and go right away.

Flush and wash and be on your way."

When I see that someone needs to use the potty, it sometime helps to start singing the song and let them finish it, so that they are reminded to go potty without me suggesting they should. This independence that older children feel is one major difference between potty training an 18 month-2 year old and a 3- 31/2 year old.


Here are some more shots of the party.

Other tips I have found out through this experience are this:

Stay in the bathroom with your child, encouraging but not pushing them.

Make sure they try to potty by first attempting to make a #1 and then making 3 pushes for #2 whenever they sit on the potty. If nothing happens fine, trying is enough. Mommy and child should be pleased with trying.

Emphasize that they will not be fussed at or punished for not being able to go in the potty or for having accidents.

Emphasize that they are learning to potty.

If the child feels comfortable with one certain person helping them, then fine, stick to that one person. It is that important that the child feel comfortable using the potty. Do whatever possible to keep the child comfortable.

So how did this all work? You may ask.
  • The training pants work pretty well for a child who needs something waterproof. After only about a week in her training pants, Cinderella was ready for panties again!!!! She begged to wear her training pants to school the second day she had them, and I reluctantly let her. She soiled them the first day, but then had no problems for the next week. Then she begged to wear her panties to school because I had been letting her wear panties with a soaker laid in or snapped in just like the training pants around the house. So, again I gave in because I didn't want to discourage her. She was successful!!! She has been wearing the panty with soaker combo for almost a week now and it seems to suit her just fine. She does have accidents but changing out the soaker is usually all the cleaning up it takes.
We are wearing panties to bed also and are wetting the bed about 50% of the time, but hey we are getting it all worked out at once.

  • They all 3 love the princess potty seat. This is the first one we've had that goes on top of the big potty.
  • We didn't really use the potty watch. We did play with it and sing the potty songs it came with, which everyone enjoyed, but I never did set it to alarm and remind us of potty time.
  • As you can see from the pictures above, the girls loved their new pajamas that came with a matching set for their friends.
I fully realize that this party was a bit extravagant, but for a little girl with terrible bathroom experiences I knew it would take something super duper fun to get her excited to use the potty again...

And so far it's worked!!!

YIPPPEEE. I'm one happy mama.