Sewing

Showing posts with label tutorial. Show all posts

Sunday, October 14, 2012

Double-Decker Hairbow Tutorial

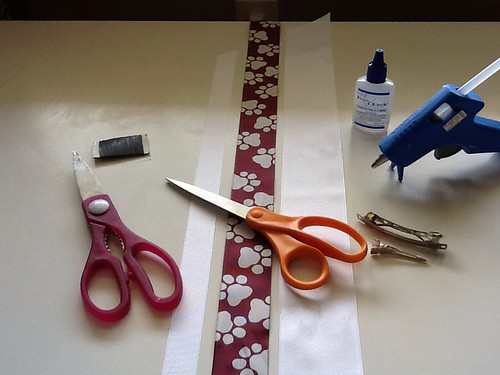
Supplies needed:
Thin wire
Wire cutters or old kitchen shears, something you don't mind using to cut wire- it will ruin your good scissors
Good ribbon cutting scissors
Fray check
Hot glue gun and glue stick
Barrette
Ribbon
7 inches of 7/8 inch grosgrain ribbon
30 inches of 1 1/2 inch grosgrain ribbon
25 inches of 2 1/4 inch grosgrain ribbon
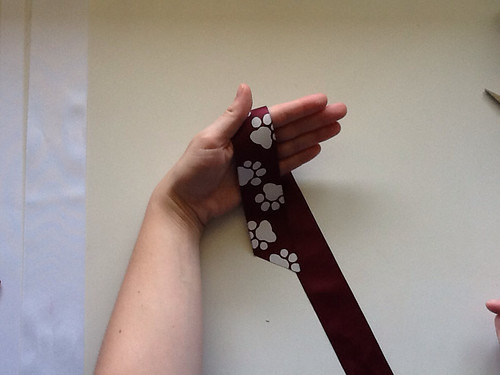
Cut 2 pieces of wire about 4 inches long and set aside.

Lay the piece of 1 1/2 inch ribbon over your hand like so. Keep in mind I am right handed. If you are left handed, then reverse the hand used.
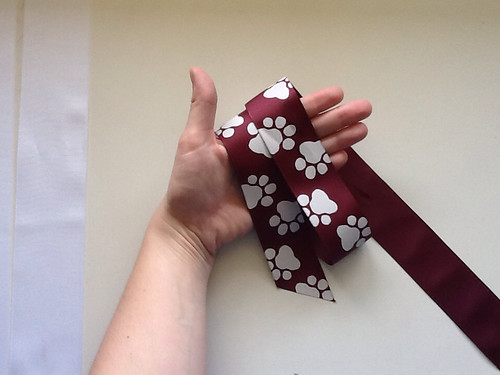
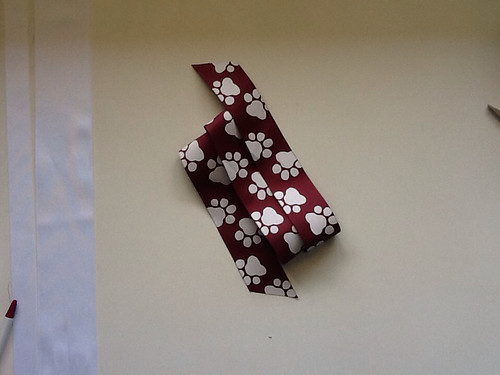
Use the long tail to make a wrap around your hand, overlapping the edge of the first piece slightly and keeping it loose at the bottom of your hand. Now make 1 more wrap around, overlapping the second layer slightly and matching the bottom area again.

Carefully lay this down on the table. Notice each layer is slightly overlapping the last and the ends of ribbon are almost the same length. The length of these wraps are what determines the size of your finished bow. These loops should be about 6 inches long.

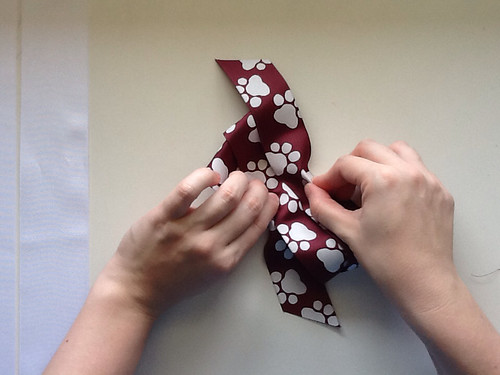
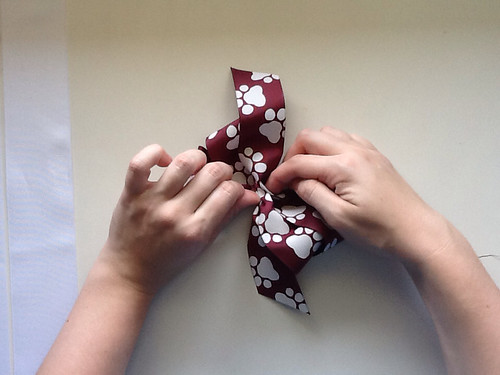
Using both hands, one on top and one on bottom, "scroonch" up the ribbon by gathering it tightly in between your fingers.

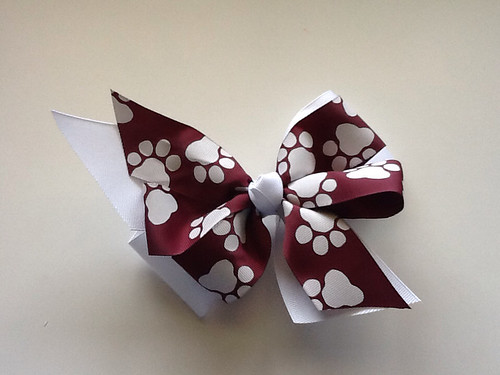
This takes practice, so be patient with yourself. If you get lots of wrinkles, just iron them out and start again. Don't iron directly on printed ribbon like this paw print ribbon though.
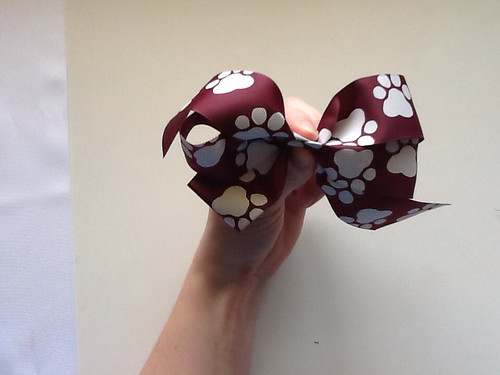
Wrap a piece of wire around the middle of this section to hold it in place while you continue working.
 
Now if you don't want a fancy smancy double-decker hairbow, you can stop here and follow the directions for finishing this smaller bow. This bow would be a good size for about a 2-3 year old.
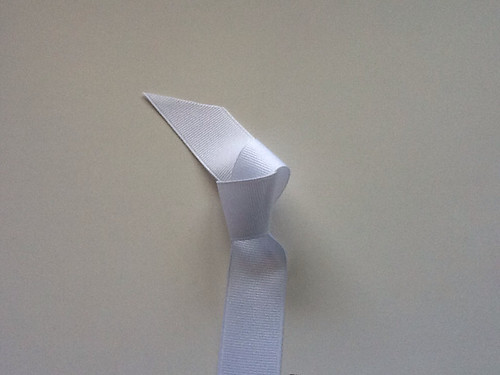
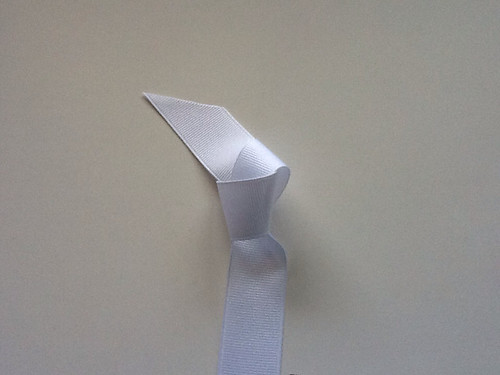
Use the piece of 7/8 inch ribbon and loop over and through itself just as you would to make a knot. Except when you do, be careful to make it pretty especially as you are tightening it down.
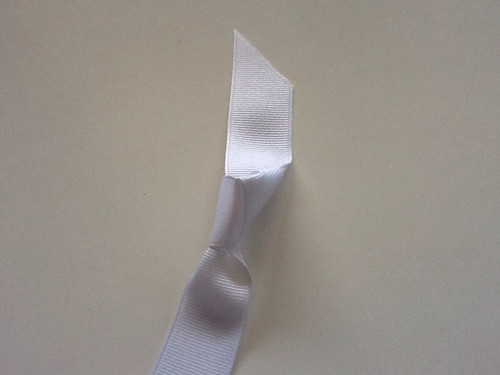
Do not tighten as much as you can, but leave it rather loose. Notice how it forms a point, or triangle in the middle, and the tails are lying flat.
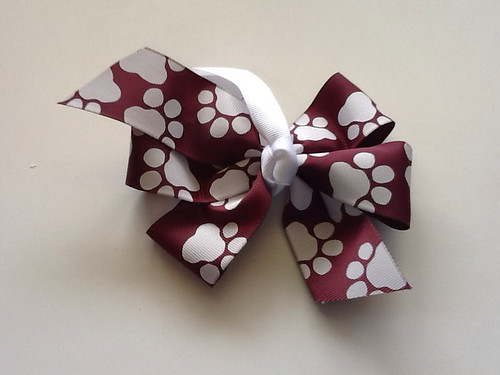
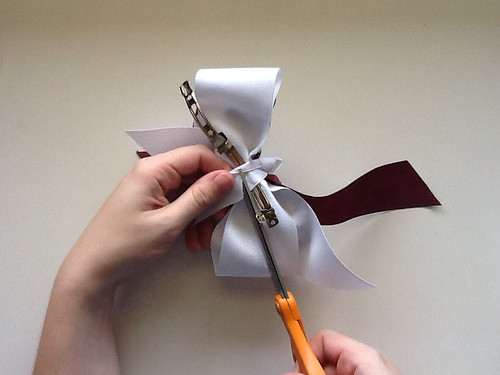
Trim the extra wire from the back of the bow, leaving enough to hold the twist together, but not so much it is in the way.
Lay the knot on the center front right over the wire, and pull one tail to the back rather tightly.
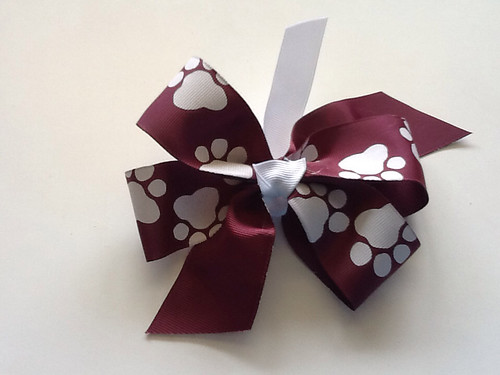
Put a dab of hot glue on the center in the back. Make sure you've got the knot centered on the front and glue the tail down. Trim away the excess tail.
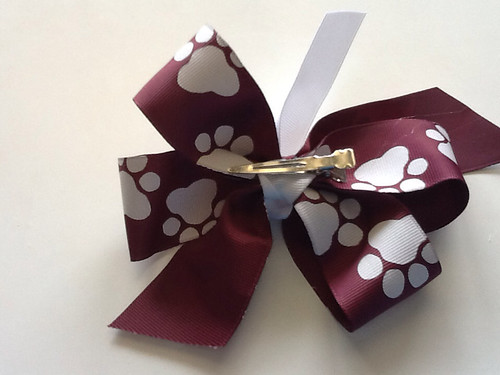
Put another dab of glue and stick the barrette down (if using the springy type of barrette see instructions below).
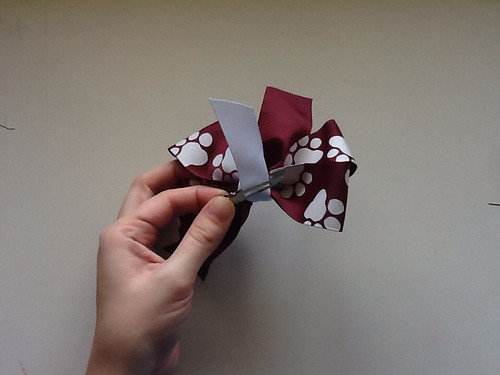
Open the barrette and pull the other tail around tightly, put a little glue underneath and stick it down.
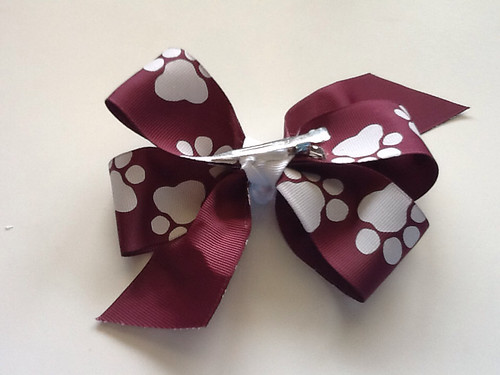
Trim away the excess tail.
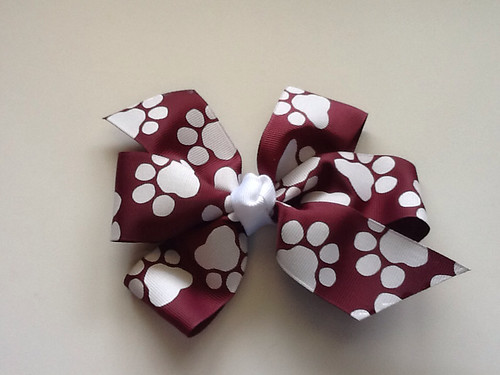
Trim ends of bow, cutting with one smooth motion at a 45 degree angle, apply fray check to the ends and you are done.
 

NOW FOR THE DOUBLE DECKER ADDITION:

Do not finish off the bow above, but stop after wrapping the wire around the first bow section, and continue below.
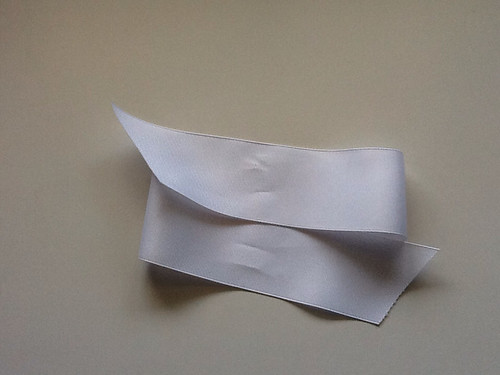
Wrap the 2 1/4 inch piece of ribbon around your hand the same as you did before, except this time you only have 2 wraps instead of three. You could also just lay it flat on the table and arrange it. Notice the edges are overlapped and the ends are cut in the same direction as the ends on the smaller bow.

Lay carefully on table. These loops should be about 7 inches long.

Scroonch up this bow and wrap with wire.
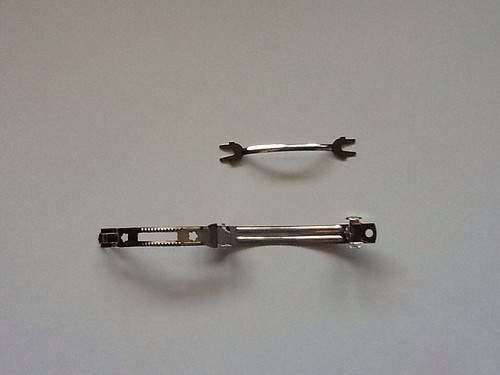
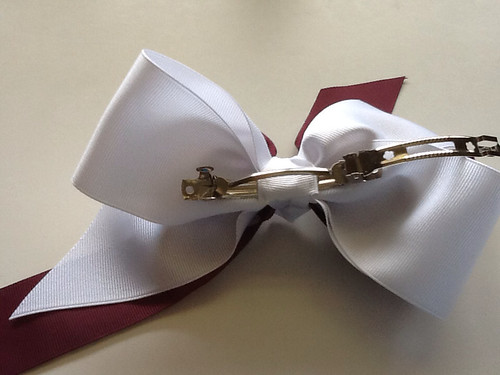
If using a springy barrette, take out the center portion and set aside (if using a clip type barrette read directions above).

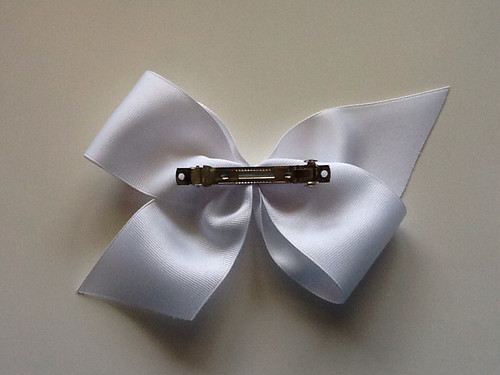
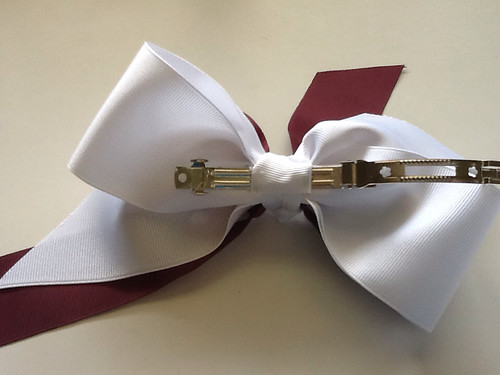
Turn large bow over, clip excess wire, and hot glue barrette onto middle of bow.

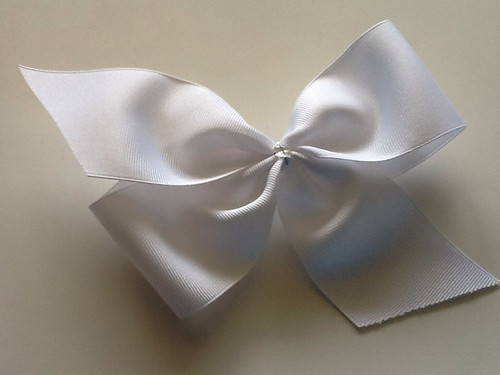
This is what it looks like from the front.

Use the 7/8 inch piece of ribbon to make a knot for the middle.

Tie a loose knot in the middle of this piece of ribbon, but do not pull tightly.

Carefully arrange the knot as you tighten it so that it is pointed in the middle and the tails are lying flat.
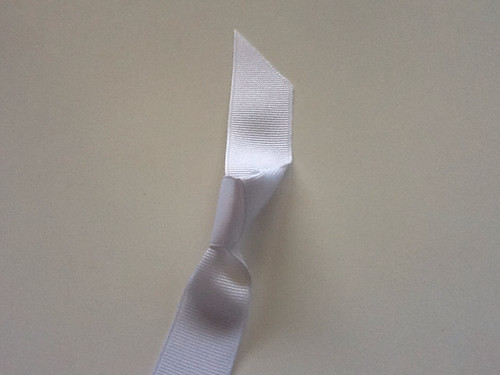
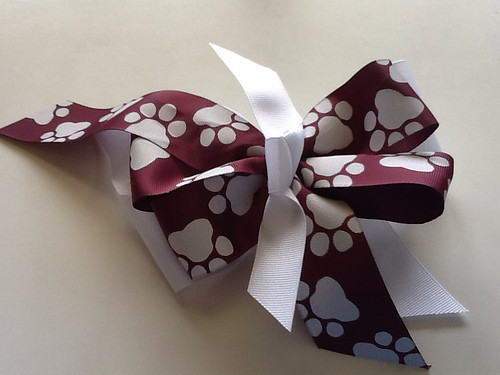
Trim wire on smaller bow.

Dab hot glue on top of larger bow and stack smaller bow on top.

Place knot in the middle and add a bit of hot glue in between here too.
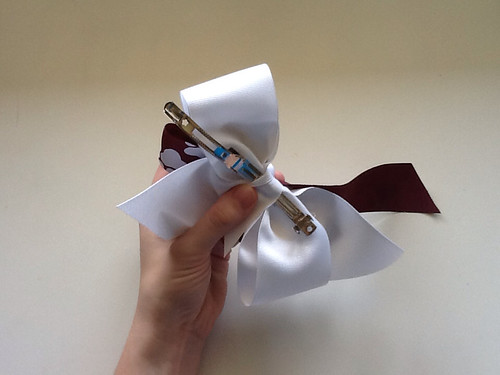
Pull one tail around tightly and hot glue the tail down on back side.

Trim the excess tail.

Pull other tail around tightly and hot glue in place also. Trim this tail.

Reinsert springy mechanism.

Trim all 4 edges so that they go the same direction and are pleasing to you. I always trim the ends last. Apply fray check or burn edges and you are done.


Friday, October 5, 2012

Super girl TUTORIAL

A friend needed a super hero outfit for her daughter, and she knew who to call.... SUPER SEAMSTRESS to the rescue!

I whipped together this outfit for her to wear in our local homecoming parade.

MASK

The mask I made in the same way that I did the cat woman mask, check it out HERE, but there are a couple of additions to this mask.

I changed the shape of the mask a bit to make it more super hero by shaping the top corners to a little point and by widening the eye.

I made a ribbon casing for the elastic and fed it through before sewing the mask because all I had was white elastic and I wanted it to be cute. I ironed 1/2" gross grain ribbon in half and sewed a very narrow seam and the 1/4" elastic fit perfectly.

I also cut out heart details to sew on the front and hot glued a rhinestone on for a little girly bling.

WRIST CUFFS

These are really easy to put together. Measure the wrist and add 2 inches. This is the length. Draw out a simple rectangle with a sloping point on one side.
I've found the easiest way to top stitch together two pieces that are the same shape is to cut out one shape, lay it on top of another piece of felt larger all the way around, top stitch together, and then cut away the excess on the larger piece. This way you don't have to worry about your fabric shifting.
After you have the cuff piece add on any embellishments and sew on a piece of Velcro on each end.

CAPE

To make the cape I used the tutorial HERE from moms rising.org. The tutorial was made by howdoesshe and she did a great job. I found it easy-to-follow. I did change a few measurements though because I needed a cape to fit a larger size child and not a toddler.

First I cut a piece of fabric 35 inches long and kept it folded in half lengthwise.

Then on one end I measured 14 inches and made a mark.

On the other end I measured 6.5" and made a mark.

Then you draw a line to connect the two. I did later decide that this would be a little too wide for my girl and cut off about 1 inch from this long side.

Now you use a plate 8 inches in diameter to make the neck. Place it 6" from the top and 5" from the fold and draw around it.

Now cut it all out 1/2" from your markings.

If adding an appliqué, do it now. I used the superhero alpha from planet appliqué.

Pin it all the way around. Use a lot of pins if using slinky fabric like my polyester knit.

Sew all the way around with a 1/2" seam allowance, leaving a hole for turning in the bottom of the cape. Clip the curves, turn right side out, press, hand sew hole closed, machine stitch on a piece of Velcro, and you are done!


Your little one will be ready to take flight!


Cat woman mask TUTORIAL

A friend asked me to make a cat woman mask for her daughter so that her children could be batman and cat woman for Halloween. This is how I did it.

Gather supplies: 1/4" elastic, black felt, black sparkly fabric

Using scrap paper I adapted a basic mask pattern by adding a cat ear.

Fold felt in half, pin, and cut mask.

Measure your model's head from ear to ear around the back, then subtract 1 inch. Now cut cut your elastic to this length.
Roughly cut a piece of the sparkly fabric bigger than the mask, and sew the felt piece onto it using a narrow seam allowance. Sewing with the felt on top will be the easiest.
Don't forget to put the elastic in between the two layers at the corner of the eye. Go ahead and back stitch over the elastic area to reinforce the elastic.
As you sew around the mask keep your elastic out of the way making sure not to sew over it when you do not intend to.
Your mask should now look like this from the front.
Carefully trim away the sparkly fabric making sure not to cut the elastic, and you are done!
 

Wednesday, August 8, 2012

Twin Nap Mats

Even though my girls will usually come home from pre-school before the afternoon nap, I wanted them to have a nap mat that they knew and felt comfortable with for those "just in case" and emergency days. I looked over all the popular tutorials and liked this style the best because:

  1. The 1 inch foam is comfortable and soft.
  2. You take the "guts" out to wash the cover, this keeps the "guts" like new and not lumpy.
I did do a few things differently than the original tutorial.

  • I used soft flannel instead of regular cotton fabric. Our mats are really soft and comfy, but be aware that flannel shrinks more than other fabrics and I had to piece one long side of my mat to make it wide enough. I also did not cut my fabric into 2 rectangles, but just folded the 1 large rectangle in half to conserve the fabric I would have lost in the seam allowance. I top stitched the blanket down the side using a large zig zag stitch.
 

  • I used pillows I already had from a hospital stay to put in the pillow section, because I wanted to be able to take it out for laundering. I added Velcro here too in the same way as for the foam section.
 

  • I serged around the closure tabs instead of turning and top stitching them.
  • I used 1 layer of "cuddle" fabric instead of two layers of minky dot for the blanket. I mainly did this to cut costs, but found finishing the edges of this frustrating. It was difficult to turn it under and hem the edges without it looking messy, serging kept it from pilling everywhere but the stitches could pull off the edge if stressed, so I made binding to cover the raw edges. This still did not look as professional as I would like because the edges looked like "lettuce" after applying the binding. In hind sight, making a 2 layer blanket would have been much easier, but also more expensive.
  • I used more binding fabric to make the small handle.

Cost Analysis:

Flannel $5.50 has been sitting in my stash since last winter, purchased on sale

Yellow fabric $1.50 has been in my stash for years, purchased on clearance when Walmart closed its fabric department

Cuddle fabric $10.00 bought with a 50% off coupon from JoAnns for this project

Foam $18.00 bought with a 50% off coupon from JoAnns for this project

Velcro $4.50

Buttons $1.55

Pillows $ free with hospital stay, lol, yeah right

Thread $1.00

= $42.05 for 2 customized mats.

$21.00 each

That is what I would expect to pay for a cheaply made mat that might be cute, but would not hold up to use and laundering. I have seen nice mats advertised for around $40-$68! I think ours are really nice and should last for years of pre-school, camp outs, and even sleep-overs.

The girls LOVE them. And I do too.


To follow the original tutorial, check out this link:

Nap Mat Tutorial by Jenny Garland

For other variations check out:

Simple Dimples Blog


Thursday, August 2, 2012

Upcycled Tunic Top TUTORIAL

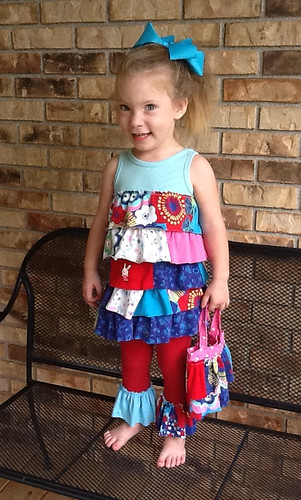
Okay, so here's the idea. I have a collection of old children's clothing that I purchased at a clearance sale, so many of them coordinate already. As I was selling last year's clothes at the local consignment sale, I kept a few other items that coordinated also. These clothes have already been worn by both of my girls and their first cousin. So they are by no means new, but they definitely still have life in them. I saw a skirt a while back that was decorated with ruffles from old clothes, and I have been wanting to try it ever since.

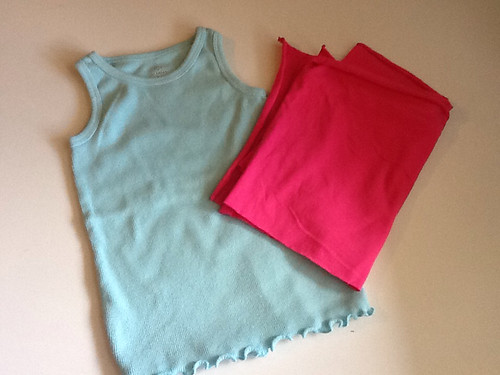
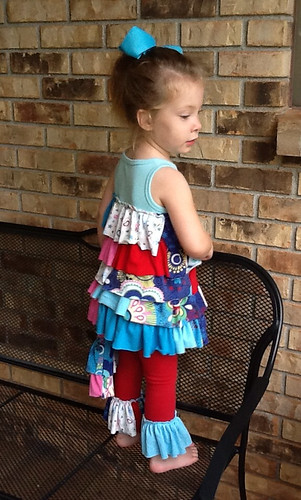
I also had this tank top on hand, so I'm going for a ruffled tunic top and maybe some Capri leggings underneath.

My Supplies

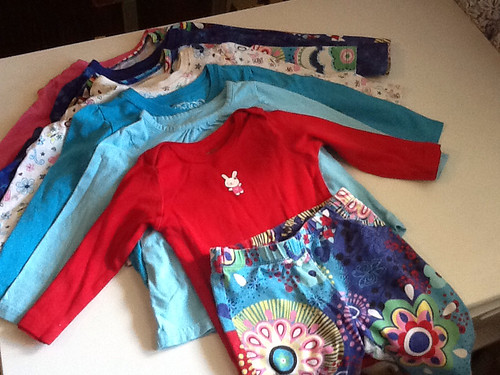
8 long sleeve knit shirts sizes 12 months-4T

1 pair of knit pants size 18 months

1 tank top size 5

1 remnant piece of pink jersey knit that measures 11 inches wide by 60 inches- I never used this piece.


I don't know how far exactly this amount of upcycled fabric will get me, but I decide to wing it and see. I could do the math, but I figured I could have it half finished by the time I measure each shirt and determine how many ruffles I can get from each. In case you want to do the math for yourself, I usually measure the circumference for the area I want to apply ruffles, then I cut the length of my ruffle twice that long. That gives a nice full ruffle. 1 1/2 times will work also, it just depends how much fabric you have to work with.

I decide that I will cut my fabric into strips of 3 1/2 inches. That way I will visibly see at least 2 1/2 inches of ruffle when I allow for a seam at the top of each strip to actually ruffle it and overlapping of each ruffle layer.

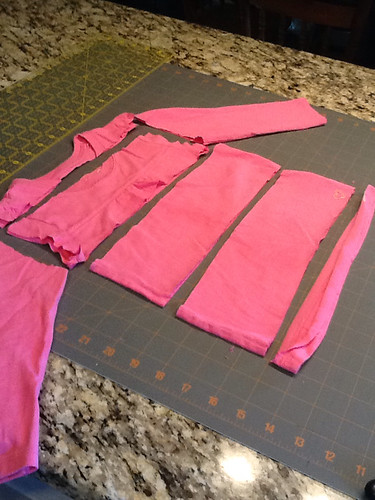
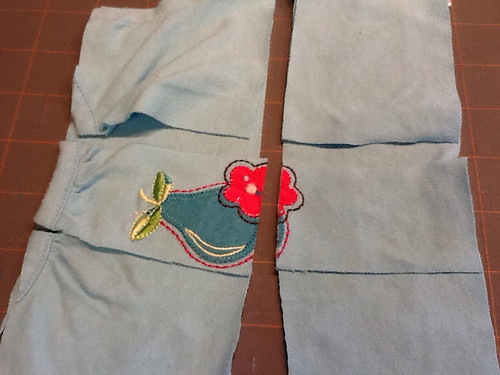
So, I pull out the mat and rotary cutter and get to stripping. I cut the bottom hem off and then measure up 3 1/2 inches and just cut as many as I can. If there is a design on the front of the shirt that I don't want, I just cut right through it and come back later to cut that part out of the strip.

Cut one side seam off of each strip so you can open it up. Some pieces aren't usable, like the front side of this top strip because it has a seam through it. I just use what I can, even if it is only 4-5 inches.


I'm not worrying too much at this point how many pieces I'm getting, or how long they are.

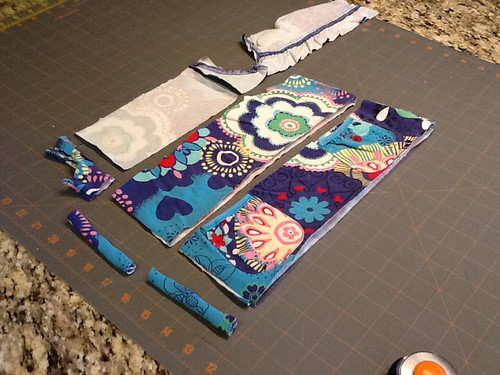
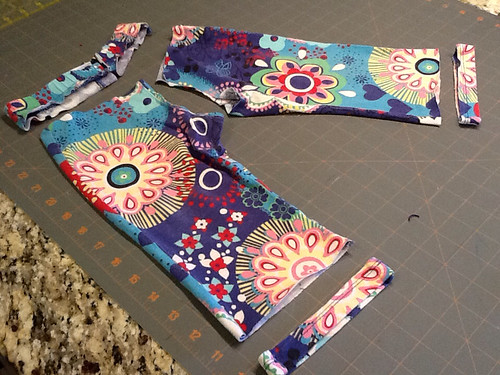
I also cut the sleeves off the shirt. Cut them open at the seam, and get a strip from each sleeve.

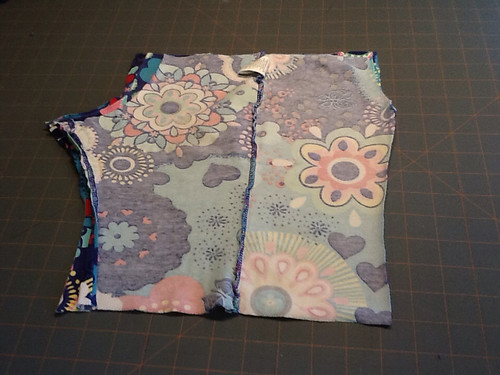
Same goes for the pair of pants.


I haven't cut up the remnant fabric yet, because I'm not sure if I'll need it for ruffles or to add length to the tank top. - should have had my model try it on for length before nap time.

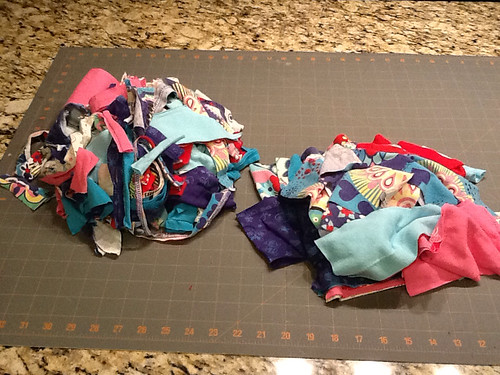
I now have 1 pile of scraps and 1 pile of strips.


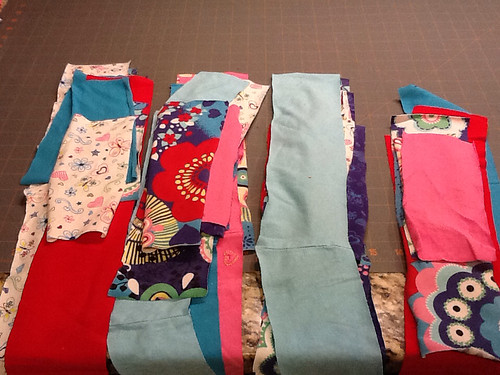
So i go about my business mixing up all the colors of strips and sewing the short ends together to make one LONG strip. I guess I'm going for the crazy look here, but you could also arrange the strips by colors or rainbow order or some pattern. I'd love to see what you come up with.

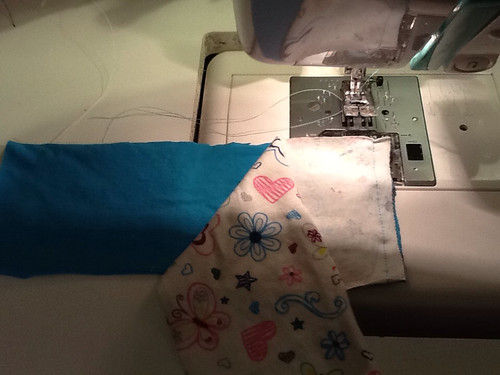
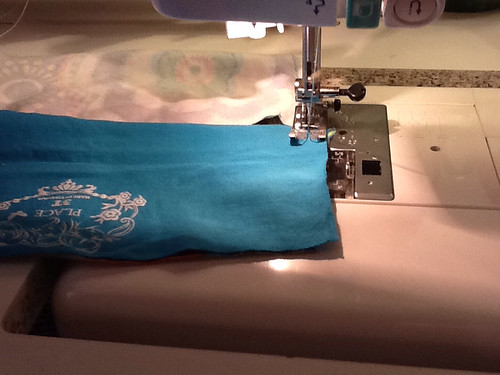
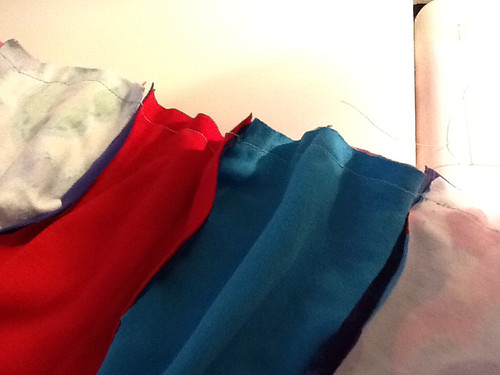
To sew the strips together, line up the short ends with right sides together. Use a 1/4 inch seam allowance and use chain stitching to get it done quickly. To chain stitch means to sew without stopping as you guide the strips under the foot without lifting it. Be aware that not all machines can do this.


Now clip all of these apart and start chain stitching again until you have just one strip.
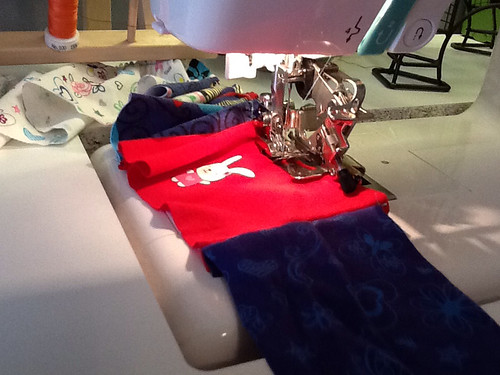
Now that I have a long strip (16 yards!), I run it through my machine with the ruffle foot on. This roughly gives me a strip 1/2 long as I had before (7 1/2 yards).

I pick out the section of the strip I want to be the center front, the rest of the ruffles I just let fall as they may.

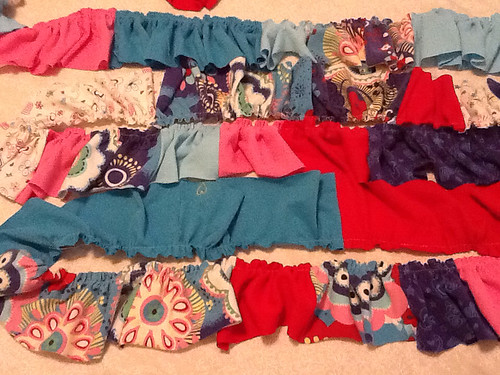
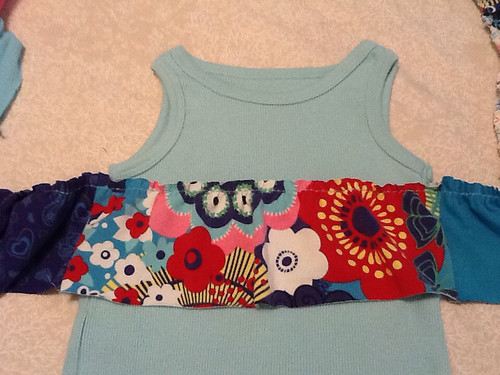
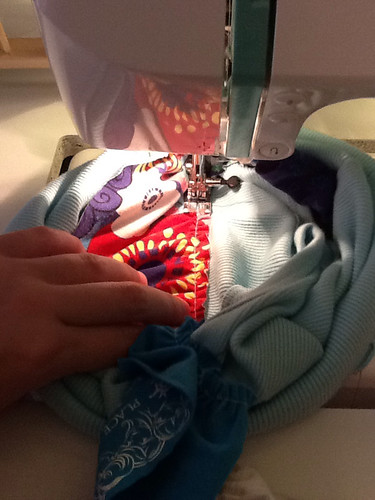
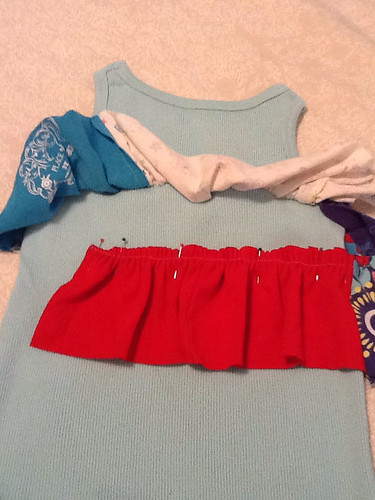
I pin this along the top edge of my tank top and sew it on with wrong side of ruffle to right side of tank. I just stitch right over my ruffling stitch. When I get all the way around i stop before meeting up with the other end of the ruffle, I leave enough ruffle to overlap the ends about 2 inches, I cut the rest off, and then continue stitching the ruffle down, back stitching at the end. Do not cut the rest of the ruffle off until you stitch it down, the tank will stretch and you will need more ruffle than you think. To keep from having a visible spot on the tank that showed where I started and stopped, I start at a different place on each ruffle layer. (one side seam, the other side seam, the middle, almost to the middle, you get the idea).

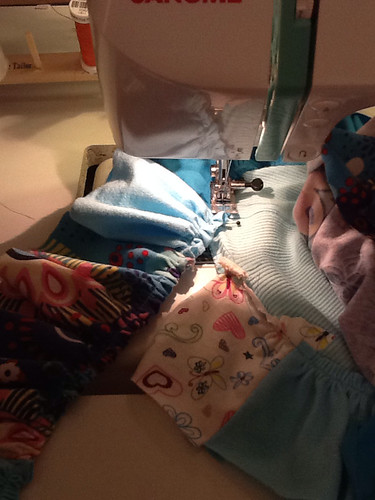
I lay out my tank that now has 1 ruffle layer on the top and flip up this ruffle to place the next underneath. Letting the top ruffle overlap about 1/2 to 3/4 inch. Then I pin this in place, and stitch it down like I did the one before it.

Before getting too much further, you want to lay out your ruffle layers to check that they will all fit nicely within the length of the tank top. If they don't then you can overlap the layers more to get them to fit and cover all the vertical space on the tank.

I work my way down the tank, layer after layer. I sew the last layer just above the bottom edge. It's not pinned on yet in this picture.

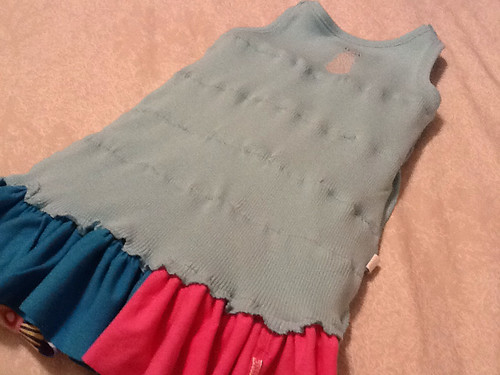
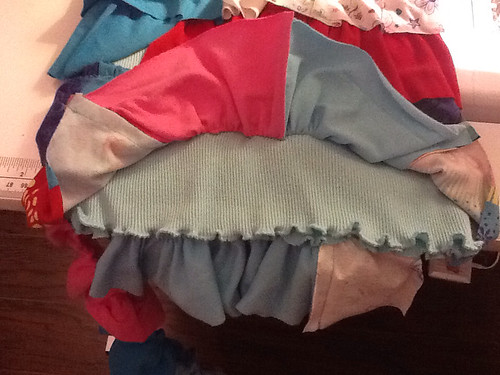
Then I'm done. This is what it looks like on the inside.


So cute. I love it!

I still have tons of ruffles left, so I round up an old pair of leggings and add some flair to them. Then the outfit needs an accessory, so I made a purse. I'll share a tutorial for that later.


I hope you enjoy this tutorial. Feel free to email or comment with questions and tutorial suggestions. Share your pics too.

Happy sewing!

Kate